How To Plan A Travel Vlog Storyboard | From Idea To Edit
Master how to plan a travel vlog storyboard with scene types, narrative structure, and the STAR method for stronger travel videos.
Author:Liam JonesReviewer:Maya ReyesApr 12, 2026139 Shares23.1K Views
You land home with 80GB of footage, GoPro clips from the market, phone video of that perfect golden-hour rooftop, and 23 takes of you trying to pronounce something in Portuguese.
Then you sit down to edit and realize something uncomfortable: you don’t have a story. You have a memory card full of moments that don’t connect. When a travel vlog feels scattered, slow, or oddly flat, it’s rarely a camera problem. It’s a planning problem.
Learning how to plan a travel vlog storyboardchanges everything. A well-designed travel vlog storyboard turns chaotic footage into a clear, engaging narrative. It helps you define your hook before you film, capture the right A-roll and B-roll at each location, and structure scenes so viewers stay oriented from the first frame to the final payoff. Instead of hoping the edit works, you film with intention so you come home with a video, not just footage.
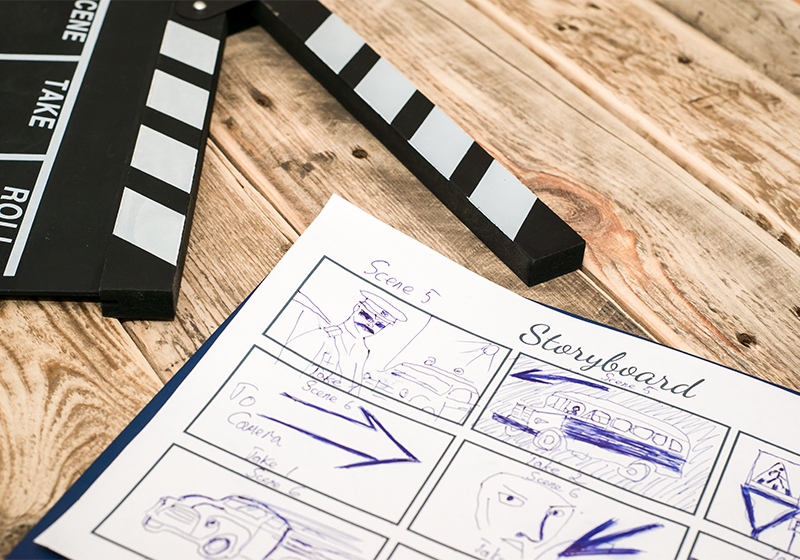
What A Travel Vlog Storyboard Is (And What It Isn't)
What is a Storyboard and How to Make One | Storyboard Tutorial
Before building a system, you need clarity on the tool.
A travel vlog storyboard is a structured visual or written outline that maps out scenes, shots, and narrative flow before filming your trip.
Many creators skip this step because travel feels spontaneous. But spontaneity works best inside structure.
What A Storyboard Does For You
- Prevents missed establishing shots
- Reduces rambling A-roll
- Improves pacing in the edit
- Protects audience retention
- Speeds up post-production
YouTube’s own Creator Academy emphasizes the importance of strong hooks and audience retention in video performance. Planning your intro and emotional peaks ahead of time directly supports those metrics.
Storyboard Vs. Shot List Vs. Script
These three tools are often used interchangeably, but they serve distinct purposes and work best when used in conjunction with one another.
- A script is narration and dialogue, what you will say on camera or in voiceover.
- A shot list is a technical checklist of every specific shot you need, organized by location or time.
- A storyboard sits between the two. It visualizes each scene's shot composition, emotional purpose, camera movement, and audio intent in a single panel.
A shot list tells your camera operator what to capture. A storyboard tells the story of why each shot matters and how it connects to what comes before and after. For a solo travel vlogger, that distinction is everything; you are the director, camera operator, and subject all at once, and the storyboard is the one document that keeps all three roles aligned.
Why Travel Storyboards Look Different From Film Storyboards
A feature film storyboard has polished illustrations of precise camera angles. A travel vlog storyboard does not need to. What it needs is clarity of intention, a rough sketch, or even a descriptive note that tells you: this scene opens wide on the harbor, the camera tilts up slowly, ambient sound only, and the goal is scale and awe.
Drawing ability is irrelevant. A stick figure under the word "WIDE" communicates the same information as a painted frame. What matters is that before you press record, you know what you are trying to capture and why it belongs in the video.
The Travel-Optimized Storyboarding Framework

How I PLAN My TRAVEL VIDEOS - Pre-Production Process
If you want your travel videos to feel clear, exciting, and professional, you need more than random clips. You need a simple system.
This travel vlog planning framework is built specifically for creators who film on the move. It connects your story idea, shot list, and YouTube video structure into one clear plan you can use on every trip.
Let’s break it down step by step.
Step 1: Define The Story Angle And Hook
Before you pack your camera, ask yourself one important question:
What is this vlog really about?
Not: “My trip to Vietnam”
Instead:
“Trying 5 iconic Vietnam cafés in one day”
This is your story angle. It gives your vlog focus and purpose. Without it, your video becomes a random collection of travel clips instead of a compelling travel narrative.
Strong angles often come from curiosity. Instead of filming “Vietnam travel vlog,” you might build your episode around unusual insights, cultural contrasts, or unexpected discoveries. For example, reviewing surprising or lesser-known fun facts about Vietnamcan instantly give you multiple hook ideas that feel specific and clickable.
A hook built around curiosity performs better because it promises discovery. “5 Things About Vietnam That Shocked Me” is far more engaging than “My Trip to Hanoi.” When your angle is built around insight, your thumbnail, intro, and pacing naturally become stronger.
The more defined your angle, the easier it becomes to plan intentional A-roll, meaningful B-roll, and emotional beats that support the story.
Why The Story Angle Matters
Your story angle directly shapes:
- Your vlog intro
- Your YouTube thumbnail idea
- Your video title
- Your A-roll talking points
- Your B-roll shot list
- Your overall travel vlog structure
When you define the angle early, every shot you capture supports one clear idea. That improves audience retention, watch time, and overall YouTube engagement.
According to YouTube’s Creator Academy, the first 15-30 seconds are critical for keeping viewers watching. That means your video hook cannot be random.
How To Plan A Strong Hook
Your storyboard should open with one of these:
- A preview of the most exciting moment
- A bold statement
- A question that creates curiosity
- A quick montage of highlights
- A surprising outcome teaser
Example:
Instead of starting with:
“Hey guys, welcome back,”
open with:
That creates immediate curiosity. If your intro feels slow, viewers click away within seconds. A planned hook solves this. Before you film anything, decide the core idea and the opening moment that makes someone want to keep watching.
If You're A Beginner, Start With The 3-Scene Version
If the full framework feels overwhelming, simplify.
For shorter or casual vlogs, start with just three scene types:
- Hook (Arrival)
- Core Activity
- Reflection (Outro)
For each, define:
- One strong shot
- One clear emotion
- One sentence of intent
That’s enough to create a coherent YouTube travel vlog structure without overcomplicating the process.
As your videos grow in complexity, expand to all six scene types.
Structure scales. It doesn’t have to overwhelm you.
Step 2: Map The Narrative Arc (Beginning, Middle, End)
A strong travel vlog storyboard is not organized by time. It’s organized by story.
Even simple travel videos work better when you follow a basic three-act structure, a storytelling model used in film, documentaries, and digital content because it mirrors how people naturally process experiences. Here’s how it works for travel creators:
Beginning - Set The Stage
This section includes:
- Your hook
- Clear context (where you are and what you’re doing)
- Expectations or stakes
Ask yourself: Why should someone care about this episode?
If you’re doing a food challenge, say it clearly.
If you’re exploring hidden places, explain the goal.
If you’re testing a budget, define the limit.
Clarity increases viewer engagement and helps your audience understand what they’re about to experience.
Middle - Deliver The Experience
This is where your main travel content happens.
Include:
- Key locations
- Challenges or surprises
- Reactions and emotions
- Visual variety (wide shots, close-ups, movement)
- Strong B-roll footage to support your story
The middle should not feel flat. Plan for escalation. Maybe each café gets better. Maybe the budget gets tighter. Maybe the weather changes your plans.
That progression creates momentum and improves YouTube retention rate.
End - Create A Payoff
Many travel vloggers forget this step.
Your ending should include:
- Reflection on the experience
- Final thoughts
- A summary of what you learned
- A natural call-to-action (subscribe, comment, watch next)
Without a planned ending, your vlog feels unfinished. A strong closing moment improves completion rate and leaves a lasting impression.
Why This Structure Works
Humans respond to emotional progression. Beginning → build → payoff.
When your video storyboard template follows this pattern, your edit becomes easier. You’re not searching for a story. You’re simply assembling one you already designed.
Plan your storyboard in acts, not timestamps.
Once your story flow is clear, the next step is turning that structure into a practical shot list for travel vlog filming.
Step 3: Build A Location-Based Shot List (A-Roll + B-Roll)
Once your story structure is clear, it’s time to translate it into real footage.
Travel adds one major challenge: you often don’t get a second chance. You may never return to that street, café, or sunset viewpoint. That’s why your travel vlog shot list should be organized by location, not by timeline.
Instead of planning, “Scene 3 comes after Scene 2,” think: “What do I need to capture while I’m here?”
This method makes your travel video planning practical and efficient.
Why Location-Based Planning Works
When you organize by location, you:
- Avoid forgetting key shots
- Reduce unnecessary reshoots
- Capture consistent lighting
- Improve your video editing workflow later
- Save time during travel days
It also supports stronger B-roll planning, which is one of the biggest weaknesses in beginner vlogs.
A-Roll (Primary Footage)
A-roll is your main on-camera content. It drives the narrative.
This includes:
- On-camera introductions
- Personal reactions
- Commentary and explanations
- Transitions between scenes
- Emotional reflections
Before filming, write short bullet points for each location. These become your vlog talking points. You don’t need a full script, just clarity on what you want to say. This keeps your A-roll focused and reduces rambling, which improves viewer retention.
B-Roll (Support Footage)
B-roll footage supports your story visually. It adds texture, atmosphere, and movement.
At every location, aim to capture:
- Establishing shots (wide city views, exterior buildings)
- Detail shots (food close-ups, textures, signs)
- Movement shots (walking, trains, street scenes)
- Ambient cutaways (people passing, hands interacting, environment sounds)
- Over-the-shoulder shots
- Slow-motion moments (when appropriate)
When organizing your shot list by location, research becomes part of your creative process. Before filming, identify the most visually compelling tourist attractionsin your destination, not just the famous landmarks, but also lesser-known spots that fit your story angle.
Strong B-roll improves your cinematic travel vlog quality and makes editing smoother because you always have visual coverage.
Pro Tip: Finish Your Coverage Before You Leave
Before leaving a location, ask:
- Did I capture a wide shot?
- Did I capture close-up details?
- Did I capture movement?
- Did I record clean audio?
You cannot recreate golden-hour lighting or spontaneous reactions later. A complete travel vlog filming checklist prevents regret in the edit.
This method protects your flexibility. If your A-roll has a mistake, strong B-roll gives you options. Capture everything you need while you’re there. Your future editor self will thank you.
Now that you’ve gathered intentional footage, the next step is shaping its flow.
Step 4: Sequence For Pacing And Retention
This is where many creators struggle.
You can have great footage and still lose viewers if your pacing is weak. Poor pacing directly affects YouTube audience retention, which influences how long people watch your video.
Retention drops when:
- Scenes run too long
- Shot types stay the same
- Energy levels don’t change
- The story loses direction
Your travel vlog storyboard template should include pacing notes not just shot ideas.
How To Sequence For Stronger Engagement
When planning your scene order:
- Alternate A-roll and B-roll frequently: Visual changes keep the brain engaged.
- Change framing every 5-10 seconds when possible: Wide → medium → close-up creates rhythm.
- Preview what’s coming next: Tease the next café, the next challenge, the next surprise.
- End scenes on forward momentum: Instead of closing a scene with “That was good,” try: “Okay… but the next place might be even better.”
This technique strengthens watch time because viewers feel guided forward.
Plan Pacing Before You Film
Many creators try to fix pacing in editing. That rarely works well.
If you don’t capture enough variety in framing or emotion, no editing trick can fully repair it.
Design your pacing during the pre-production process, not during post-production.
Retention is not an editing trick. It’s a planning decision made before filming begins.
If you analyze the structure of the best celebrity vlogs, you’ll notice a pattern: they rarely open slowly, and they rarely let scenes linger without purpose. They preview key moments early, change shot framing frequently, and maintain forward momentum throughout the video.
Step 5: Add Flexibility For Spontaneous Moments
A strong travel vlog storyboard should never feel rigid.
Travel is unpredictable. Trains get delayed. Restaurants close. Weather shifts. Sometimes the best moment happens by accident. Overplanning kills authenticity. Underplanning kills clarity. The solution is controlled flexibility.
Build “Breathing Space” Into Your Storyboard
Leave blank placeholders in your plan labeled:
- “Unexpected moment.”
- “Reaction insert”
- “Surprise highlight”
- “Local interaction”
- “Behind-the-scenes clip”
These act as flexible containers for authentic experiences.
This approach keeps your travel storytelling natural while protecting your overall narrative flow.
Why Flexibility Improves Authenticity
Viewers connect with real reactions, not scripted perfection.
When you allow space for spontaneous emotion:
- Your vlog feels more human
- Your storytelling feels less forced
- Your travel content creation becomes more enjoyable
The goal is not perfection. It’s clarity with personality. The best travel vlog storyboard is structured but breathable. It gives you direction without removing discovery.
The Six Scene Types Every Travel Vlog Storyboard Needs

Most vloggers plan shots. Strong creators plan scenes.
A shot is just a camera angle. A scene has a purpose in your story. When you define clear scene types inside your travel vlog storyboard, your video feels intentional instead of randomly assembled. Each scene plays a narrative role inside your overall travel video structure, guiding the viewer emotionally from beginning to end.
Scene Type 1: The Arrival (Hook Your Viewer In The First 30 Seconds)
The Arrival is not you walking through an airport terminal. It is the moment your viewer steps into the world of your video.
This is your video hook, and it must answer one question fast: why should I keep watching? If that answer isn’t clear, audience retention drops quickly.
A strong Arrival scene creates immersion. That might be an unexpected wide shot, strong ambient sound, a bold line of narration, or a quick montage preview of what’s coming. The goal is to spark curiosity.
Instead of starting with, “Hey guys, I just arrived,” consider opening with tension or intrigue. For example: “It’s 6 am, the streets are empty, and I’m about to test something locals say tourists always get wrong.” That framing introduces a story, not just a location.
Mood matters here. A fog-covered street at sunrise, market vendors setting up before dawn, rain hitting cobblestones these sensory details strengthen your travel storytelling and immediately pull viewers in.
From a travel vlog planning perspective, always prepare two Arrival versions: one for ideal conditions and one backup option. Weather, lighting, and timing are unpredictable. If golden hour disappears, you still need a compelling entrance into the story.
Scene Type 2: The Context Shot (Where Are We And Why Does It Matter?)
After curiosity comes clarity.
The Context scene answers where you are, what makes this place distinct, and what tone the episode will carry. This is where classic establishing shots do their work.
Context scenes are usually wider and calmer than the Arrival. Think skyline reveals, street-level walk-throughs, or landscape panoramas that define scale. Often, these moments work best with minimal dialogue. Let the visuals and natural sound build orientation.
Without context, viewers feel disoriented. When people don’t understand where they are or why it matters, watch time suffers because the brain is working too hard to process basic information.
A well-planned Context scene anchors your audience. It creates stability inside your travel vlog structure, so they can relax and focus on the experience instead of trying to figure out what’s happening.
Scene Type 3: Core Activity (The Heart Of Your Episode)
The Core Activity is the central experience your vlog is built around. It is the engine of your travel vlog content and where most of your A-roll footage lives.
This could be a food challenge, a local workshop, a hiking route, or exploring a hidden neighborhood. Whatever your main idea is, this scene delivers the promise made in your hook.
To keep this section organized, divide it into three natural movements: the approach, the immersion, and the reveal.
The approach captures your arrival and first impressions. The immersion is where you fully engage with the experience, interacting, reacting, and exploring details. The reveal is the emotional high point: the unexpected twist, the strongest reaction, or the moment that validates the story angle.
Many vloggers try to script every second of this section. That usually backfires. Authentic moments rarely unfold exactly as imagined. Instead of rigid scripting, build “open discovery” spaces into your video storyboard template. These gaps allow real reactions and surprises to happen naturally.
This balance between structure and flexibility strengthens your cinematic travel vlog style while protecting authenticity.
From a practical standpoint, make sure the Core Activity includes visual variety and emotional progression. Changing framing, capturing clean audio, and marking emotional beats in your storyboard improve both pacing and video editing workflow later.
Scene Type 4: The Reaction Shot (The Moment That Makes It Human)
Beautiful visuals alone do not create an emotional connection. What makes a travel vlog memorable is the human response inside it.
Reaction shots are one of the most under-planned elements in a travel vlog storyboard, and when they’re missing, even stunning footage can feel distant or emotionally flat.
A reaction is not you saying, “This is amazing.”
- It’s the close-up when you taste something unexpected
- It’s the pause before answering a local’s question
- It’s the subtle expression when you reach the top of a hill and see a view you didn’t expect
These are the moments that turn a well-shot video into compelling travel storytelling.
From a viewer’s perspective, reaction shots create empathy. They increase emotional investment, which supports stronger audience retention and longer watch time.
How To Plan Reaction Shots
You don’t need to script reactions. But you do need to anticipate them.
Inside each core activity section of your video storyboard template, mark at least one placeholder labeled “Reaction moment.” You may not know exactly when it will happen, but by planning for it, you remind yourself to keep the camera rolling and pointed at your face during key moments.
This small habit dramatically improves the emotional depth of your travel content creation.
Scene Type 5: The Transition Scene (Move The Story Without Losing Viewers)
Transitions are the connective tissue of a strong travel video structure. Yet they are often treated as an afterthought.
A good Transition scene communicates movement across time, location, or emotion without needing heavy narration. It keeps your story flowing smoothly.
Instead of cutting abruptly from one café to another, a planned transition might show a time-lapse of clouds shifting over the city. Instead of jumping neighborhoods with no context, you might include a tracking shot walking through a doorway or crossing a street.
These small moments quietly improve your video pacing and strengthen narrative clarity.
Why Transitions Matter For Retention
Abrupt cuts confuse viewers. Confusion reduces YouTube retention rate because the brain has to reorient.
Transitions give the viewer breathing room. They create rhythm. They signal that something is changing.
Plan at least two or three transition moments per filming day. These shots are usually quick to capture, often under a minute, but they do enormous work inside your video editing workflow.
Scene Type 6: The Outro (Closure That Feels Earned)
The Outro is where many vloggers become generic. They summarize quickly, say goodbye, and ask people to subscribe.
But a strong Outro does something more powerful: it answers the original question.
If your central story angle was, “Is Lisbon still worth visiting?” your Outro gives your honest conclusion. If your video asked, “Can I eat well on €20?” this is where you reveal the result.
That closure creates narrative satisfaction.
It also strengthens your overall travel vlog narrative arc because the ending connects directly back to the hook. Viewers feel that their time was respected.
From a strategy perspective, this improves the perceived value of your content, which increases the likelihood of repeat views and stronger YouTube engagement over time.
You can still include a natural call-to-action, but it should feel integrated. For example, instead of a generic reminder, tie it to the story: “If you want to see how this compares to Madrid, that video is next.”
How To Fill In Your Storyboard
How To Create a Storyboard (ft. Mary Doodles & Whitney Lee Milam)
Once you’ve mapped your six scene types, you need a simple way to fill them in panel by panel.
That’s where the STAR panel methodbecomes useful. It gives every storyboard panel the same four fields:
Scene type
Type of shot (size)
Audio intent
Reaction or emotion goal
When you fill in these four elements for every panel, you stop filming randomly. You start filming with purpose. And when you sit down to edit, you won’t wonder what a clip was supposed to accomplish inside your travel vlog storyboard.
Let’s break it down.
1. Set The Scene Type And Location
At the top of each storyboard panel, write two things clearly:
- The scene type (Arrival, Context, Core Activity, Reaction, Transition, Outro)
- The exact location where you’ll capture it
Avoid Vague Descriptions.
Not: “Lisbon old town.”
Instead: “Alfama district, narrow tram street near Portas do Sol viewpoint.”
Specificity improves your travel vlog planning workflow. When you’re on location with limited time, clarity reduces hesitation. You don’t waste energy deciding where to stand or what to film.
This is especially important for travel content creation, where lighting windows, crowds, and weather shift quickly.
Clear location notes also improve your video production efficiency. When reviewing footage later, you instantly remember the context of each clip.
2. Choose Your Shot Size (Wide, Medium, Or Close-Up)
Shot size is one of the most powerful storytelling tools in a travel video structure.
It directly affects how your audience feels.
Wide Shots
Wide shots communicate scale, isolation, and awe. They place you inside a larger environment. These are your classic establishing shots and are essential for context.
Medium Shots
Medium shots communicate connection and conversation. They’re commonly used for A-roll footage, especially when speaking directly to the camera.
Close-Ups
Close-ups communicate intimacy and emotion. They capture detail hands holding food, texture on a wall, your eyes reacting to something unexpected.
In travel vlogging, close-ups are often underused. Yet they are the most powerful tool for emotional storytelling.
A common mistake is filming entire scenes in medium shot. The result feels flat, like watching someone talk instead of experiencing a place.
Inside your video storyboard template, plan for at least two shot sizes per scene. This creates visual rhythm and improves YouTube viewer engagement.
3. Define Camera Movement (Static, Pan, Tilt, Tracking, Handheld)
Camera movement changes energy. Stillness creates focus. Movement creates momentum.
Both are powerful tools in your cinematic travel vlog planning.
Static
A static shot works well for emotional beats, reaction moments, or reflective dialogue. When the subject carries the weight of the scene, movement isn’t needed.
Pan Or Tilt
Slow pans and tilts are ideal for revealing context. For example, tilting from a close-up of coffee to a wide café interior builds spatial awareness inside your travel storytelling.
Tracking
Tracking shots walking with the camera create immersion. They are effective for markets, busy streets, and exploration sequences.
Handheld
Intentional handheld movement communicates authenticity and immediacy. It works especially well for spontaneous discoveries or emotional reactions.
Inside your STAR panel, write the movement in one or two words. This isn’t a technical manual. It’s a reminder.
For example:
“Core Activity – Alfama Tram Stop – Medium – Tracking – Curious/Excited.”
That one line carries narrative, visual, and emotional intent.
Strong movement planning improves your video pacing, strengthens immersion, and gives you more flexibility in your editing process.
4. Write Your Audio Intent (Ambient, Narration, Music-Only, Or Dialogue)
Strong visuals get attention. Strong audio creates emotion.
When filling in your travel vlog storyboard, your audio choice should never be accidental. Audio intent tells you what emotional layer sits beneath the visuals. It also makes your video editing workflow dramatically easier because you already know what each clip is supposed to sound like.
There are four primary audio types to plan for.
Ambient Sound
Ambient sound lets the place speak for itself. This includes street noise, market chatter, ocean waves, wind, footsteps, or café background noise.
Ambient works especially well for establishing shots, Arrival scenes, and transition moments. It creates immersion and strengthens your travel storytelling without extra narration.
Instead of telling viewers “this market is busy,” let them hear it.
Narration
Narration guides interpretation. It helps viewers understand what they’re seeing and why it matters.
This is most useful during core activity scenes and the Outro, where clarity and reflection are important. Planned narration improves the structure inside your travel video narrative and keeps viewers oriented.
If your story angle involves a challenge, comparison, or question, narration helps reinforce that thread.
Music-Only
Music-only sequences work best for montage moments and transitions where pace and mood matter more than explanation.
These sections strengthen video pacing and give your vlog rhythm. However, music should support the story, not replace it.
If every scene uses music, emotional variation disappears.
Dialogue
Dialogue includes planned conversations with locals, guides, vendors, or companions. It also includes on-camera explanations that are more structured.
Dialogue scenes require preparation. Think about framing, mic placement, and clarity. Clean audio improves perceived production quality and supports stronger YouTube engagement.
Tip: Always Record Clean Ambient Audio
Even if you plan to overlay music, record 20-30 seconds of clean ambient sound at every location.
This gives you options in the edit. And options protect your storytelling.
In professional travel content creation, flexibility is everything. Ambient sound can rescue flat footage, smooth awkward cuts, and elevate simple visuals.
Inside your STAR panel, simply write: “Ambient,” “Narration,” “Music,” or “Dialogue.” That one word saves time later.
Now we move to the most powerful field of all.
5. Name The Emotion You Want The Viewer To Feel
Most creators skip this step. For every storyboard panel, write one emotion.
Just one word.
- Awe
- Curiosity
- Warmth
- Tension
- Delight
- Unease
- Freedom
- Wonder
This single word becomes your emotional filter.
When you’re on location with limited time, asking, “Does this shot create awe?” immediately eliminates weak angles. It sharpens your focus faster than technical adjustments ever could.
This step strengthens your travel vlog narrative arc because it ensures emotional progression. If every scene feels neutral, your vlog feels flat. If emotions evolve, your video feels alive.
Emotion planning also improves audience retention. Viewers stay when they feel something. They leave when they don’t.
In practical terms, your STAR panel might look like this:
Core Activity — Alfama Tram Stop — Medium — Tracking — Ambient — Curiosity
That final word ensures the scene serves a purpose beyond visuals.
A Real Example Of A Completed STAR Panel
Seeing the framework once is helpful. Seeing it filled in makes it usable.
Here’s what a completed travel vlog storyboard panel looks like in practice:
| FIELD | ENTRY |
| Scene Type | Core Activity |
| Location | Alfama tram stop near Portas do Sol |
| Shot Size | Medium → Close-up |
| Movement | Tracking |
| Audio | Ambient + light narration |
| Emotion Goal | Curiosity |
| Purpose | Introduce first food stop and build anticipation |
Notice what this does:
- It defines where you are.
- It defines how the shot looks.
- It defines how it sounds.
- It defines how it should feel.
- It defines why it exists.
That clarity removes guesswork in the edit.
If every scene in your travel vlog planning workflow has this level of intention, your footage stops being random clips and starts being structured narrative material.
How To Rebuild Your Storyboard When Plans Change Mid-Trip
When the plan falls apart, your first move is to return to your central story sentence, not your shot list. Ask: What do I need to still tell this story, even with what went wrong?
Often, the disruption becomes the story. A closed restaurant leads to a street food discovery. A canceled tour leads to a spontaneous conversation with a local. These moments are frequently better than what was planned.
For every filming day, define your story minimally before you leave: the three to four shots that, if you got nothing else, would still allow you to assemble a coherent scene. These are almost always one establishing wide shot, one A-roll talking-head shot in context, one close-up detail, and one transition.
With those four shots, an editor can build something. With 200 shots and no Story Minimum covered, the edit is chaos.
Knowing your priority system going in makes every tool you use to build the storyboard more effective.
How Long Does It Take To Plan A Travel Vlog Storyboard?
Most creators overestimate the time required.
Here’s a realistic breakdown:
- 10 minutes:Sketch scene types + story angle before leaving your hotel.
- 30 minutes:Add shot size, movement, and emotional goals.
- 1-2 hours:Full STAR method with location research and backup options.
Even the 10-minute version dramatically improves travel video pre-production.
The goal is not perfection. It’s clarity.
Tools And Templates To Build Your Travel Vlog Storyboard
The best storyboard tool is the one you will actually use on location, in low WiFi, at 6 am, before a shoot. Complexity is the enemy of consistency here.
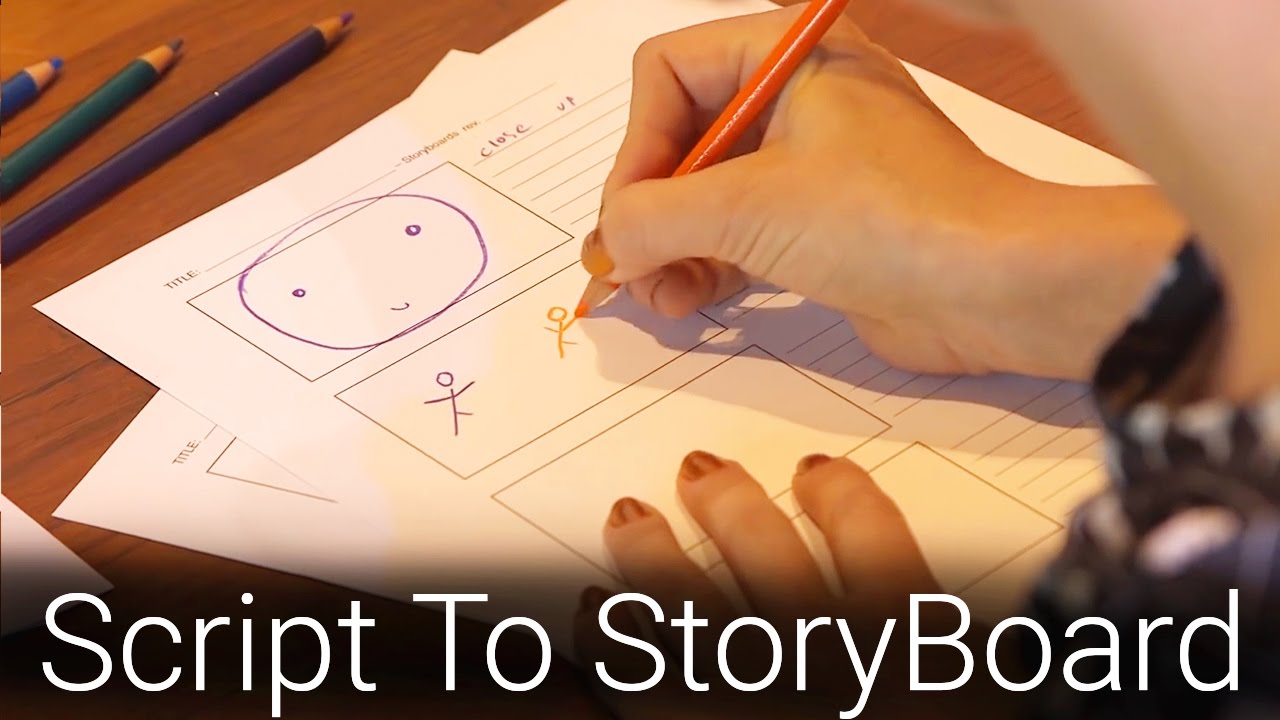
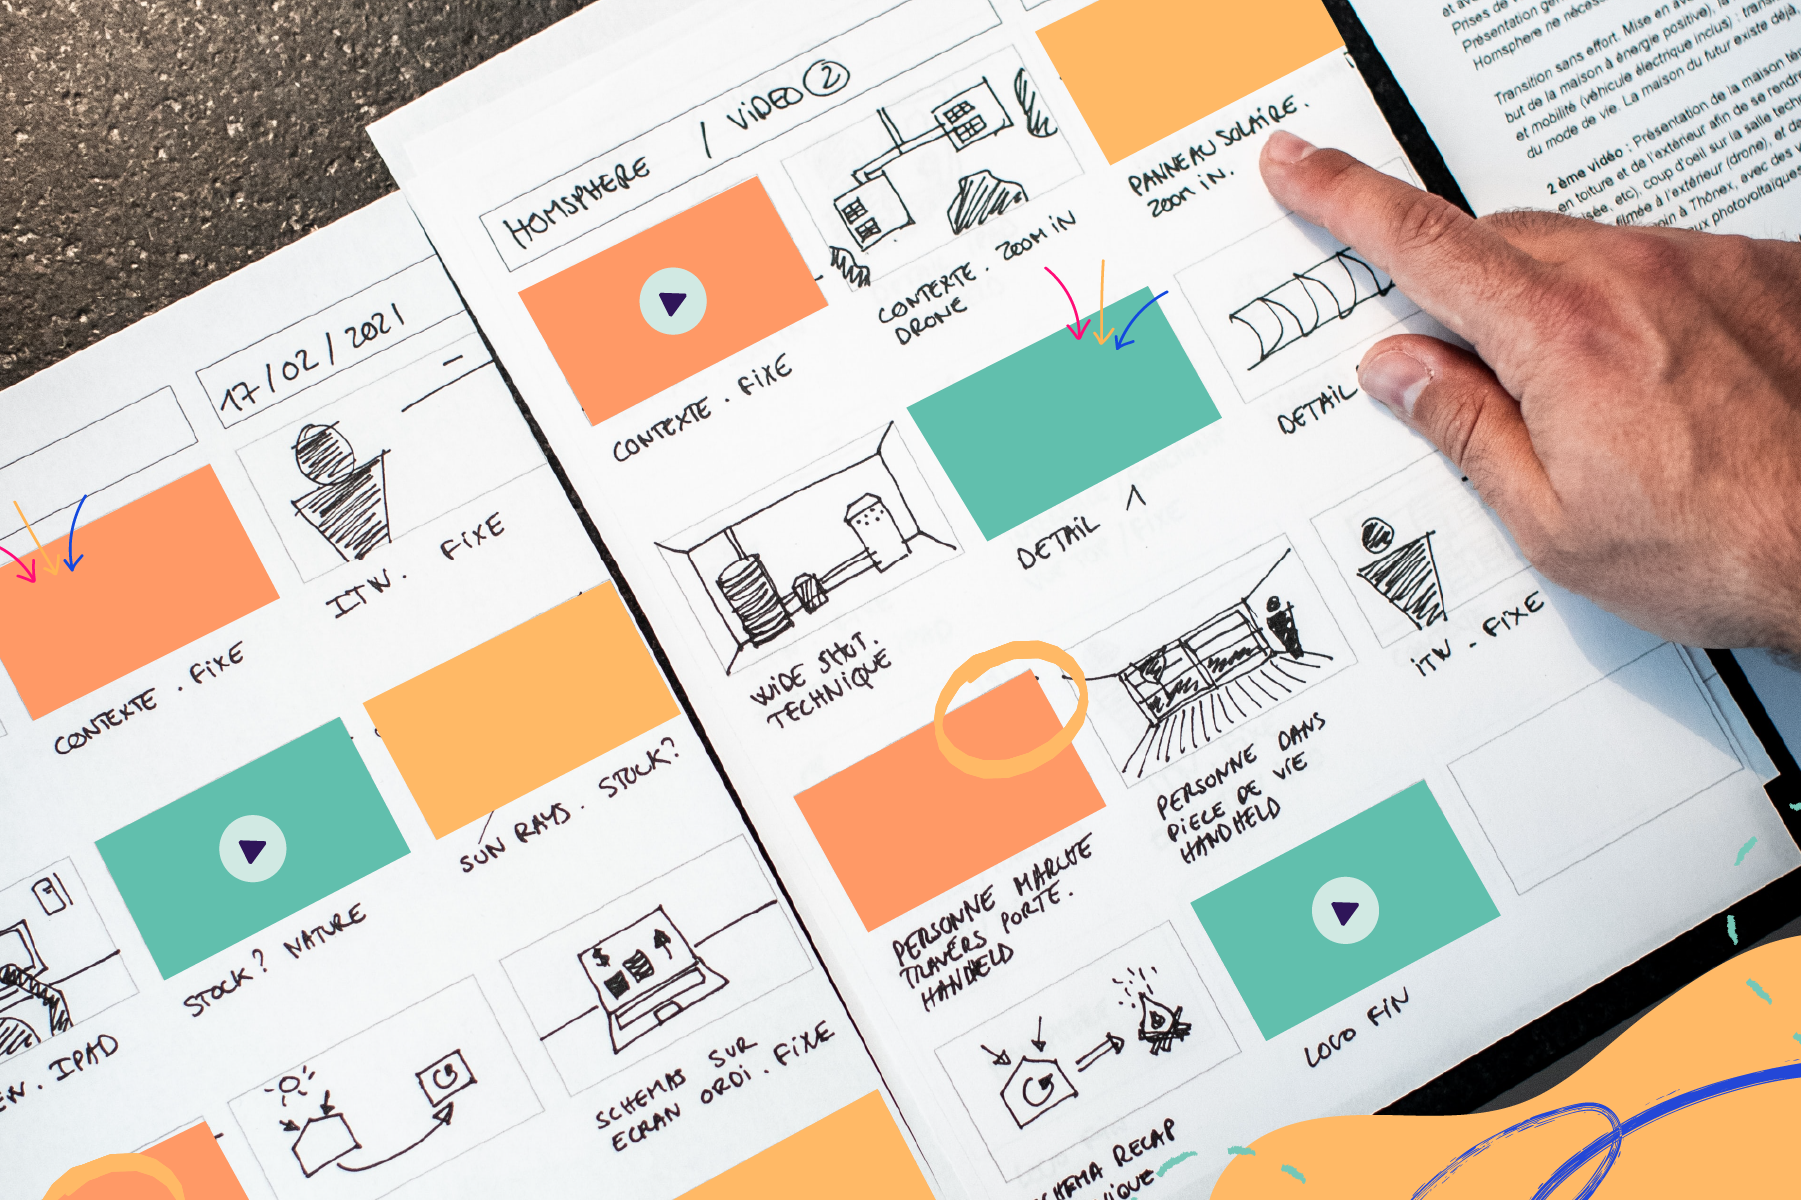
1. Paper And Printed Templates (Best For Offline, Pre-Flight Planning)
A simple printed grid, eight to twelve blank panels with labeled fields for Scene Type, Shot, Movement, Audio, Emotion, is still the most reliable storyboard tool available. No battery. No login. No sync issues.
Print two copies: one for planning at home, one for the field. Laminate the field copy if you are going anywhere near water or humidity. The act of writing by hand also forces slower, more intentional decisions, which tends to produce better storyboards.
2. Milanote - The Visual Board Built For Creative Projects
Milanote is the closest thing to a purpose-built storyboard tool for visual content creators. It allows you to arrange image reference cards, text notes, and panels in a free-form visual board that mirrors the spatial logic of a real storyboard.
Its free tier (verify current plan limits at milanote.com) is generous enough for most travel vloggers. The mobile app is functional, though the desktop experience is significantly better for planning. Best for vloggers who think visually and want to attach reference photos directly to each scene panel.
3. Canva Storyboard Templates - Fast And Mobile-Friendly
Canva offers pre-designed storyboard templates that can be filled in quickly on mobile. They are less flexible than Milanote but faster to populate, which makes them useful for rapid day-before planning sessions in a hotel room.
The main limitation is that Canva's storyboard templates are designed for presentation decks, not film production; the fields do not naturally accommodate camera movement or audio intent notes. Customize a template to include the STAR fields before your first trip.
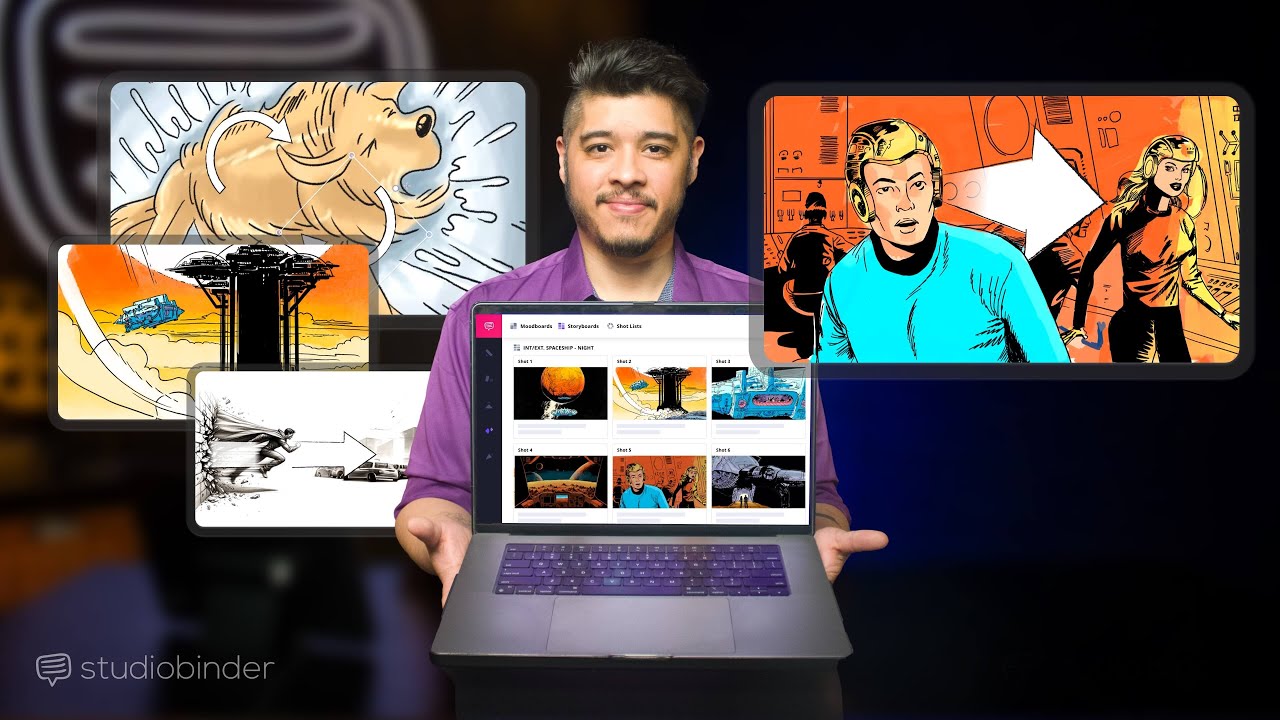
4. StudioBinder - For Vloggers Scaling Into More Professional Shoots
StudioBinder is a professional film production platform that includes shot lists and storyboard tools built specifically for video production. It integrates shot size, movement, lens, and scene notes into a single interface and can export clean, shareable documents.
5. Your Phone's Native Camera Roll + Notes App - The Zero-Cost Method
For vloggers who want zero friction: photograph reference images from Google Maps, Instagram, or your own scouting walk, organize them into a phone album by scene type, and attach a Notes app entry with STAR fields for each one.
It is not elegant. It works flawlessly with no WiFi, no app, and no learning curve.
Storyboarding Mistakes Travel Vloggers Make
Avoiding these mistakes can instantly improve your travel vlog storyboard, strengthen your video structure, and boost audience retention.
- Overplanning Every Word: Full scripts kill natural reactions. Use talking points instead to keep your A-roll authentic.
- Underplanning Transitions: Ignoring transitions creates jumpy edits and weak video pacing. Plan simple bridge shots between locations.
- Ignoring Lighting Windows: Poor timing hurts your cinematic travel vlog quality. Plan key scenes around better natural light when possible.
- Filming Chronologically Without Intent: Real life is chronological. Strong travel storytelling is structured. Plan scenes by emotional flow, not timeline.
- Forgetting the Ending: Fading out without reflection weakens your narrative arc. A clear Outro improves completion rate and perceived professionalism.
People Also Ask
What Tools Can I Use To Create A Travel Vlog Storyboard?
Common tools include printable templates, Notion, Google Docs, Milanote, Canva, or even your phone’s Notes app. The best tool is the one you’ll consistently use on location.
What Makes A Good Travel Vlog?
Clear story angle, emotional progression, varied shot types, natural reactions, strong audio, and a satisfying ending.
How Do Travel Vloggers Plan Their Videos?
Most plan around a central story idea, map scenes in advance, create a location-based shot list, and capture both structured moments and spontaneous reactions.
How Do I Make My Travel Vlog Look Cinematic?
Use varied shot sizes, intentional camera movement, natural lighting (especially golden hour), clean audio, and structured scene progression.
Do I Need A Storyboard For A Travel Vlog?
Not every vlog requires a detailed storyboard, but even a simple outline improves structure, reduces missed shots, and speeds up editing. The more complex your trip, the more valuable a storyboard becomes.
Final Thoughts
Footage is raw material. A travel vlog storyboard is the decision made before you’re tired, rushed, or losing the light about what story you’re there to tell.
The STAR panel method and the six scene types aren’t restrictions. They are structured. They turn spontaneity into intentional travel storytelling. The unexpected moment fits into a scene. The transition you might skip becomes essential. Editing becomes faster because the story is already clear.
If this framework helped you think differently about your next vlog, save it for your next trip or share it with another creator who’s tired of coming home with footage instead of a story.
Jump to
What A Travel Vlog Storyboard Is (And What It Isn't)
The Travel-Optimized Storyboarding Framework
The Six Scene Types Every Travel Vlog Storyboard Needs
How To Fill In Your Storyboard
How To Rebuild Your Storyboard When Plans Change Mid-Trip
How Long Does It Take To Plan A Travel Vlog Storyboard?
Tools And Templates To Build Your Travel Vlog Storyboard
Storyboarding Mistakes Travel Vloggers Make
People Also Ask
Final Thoughts
Liam Jones
Author
Liam Jones has made it his mission to prove that adventure doesn’t need a hefty budget. Having traveled to over 40 countries, he specializes in finding affordable ways to experience the world, from the best street food in Bangkok to hidden gems in Lisbon.
Liam’s travel tips have reached thousands of readers, empowering them to see the world on a shoestring budget without sacrificing quality. With a deep passion for local cultures, he continues to share his travel hacks, ensuring adventure remains accessible to all.

Maya Reyes
Reviewer
Maya Reyes’s wanderlust was sparked in the temples of Luang Prabang, where the scent of lemongrass and the chants of monks revealed the transformative power of travel.
Since then, her journey has been defined by cultural immersion and authentic connections. From learning batik in Indonesia to sharing meals with nomadic families in Mongolia, Maya seeks experiences that highlight the human stories behind each destination.
Travel for her is a way to weave her narrative into the world’s cultural tapestry, creating bridges across diverse ways of life. Maya has traveled to 15 countries and shares her insights through writing and storytelling.
Latest Articles
Popular Articles